Saturday, August 27, 2016

Fat Girl Mentality

Hey guys! Wow, so hard to believe summer is almost over! Major bummer! I have definitely enjoyed the amazing weather we’ve had this year - super hot, just the way I like it! Every year I always worry about having a mild summer, which makes those pool passes I get a waste, and this summer has not been a disappointment! I love, love, love getting a good sweat on, but running in mid afternoon heat for an hour is almost an over load. Almost. Running has definitely been a vice for me. I never, ever thought that I would be the girl that got up and got a run in soon after getting out of bed! I look back at myself four years ago and I can’t believe the way I have changed both physically and mentally. The positive changes are astounding!

There are some things that haven’t quite changed and that’s what I’m going to touch base on today. It’s been a while since I’ve put up a new blog post and that’s because this one has been so hard to write. (In fact I had to re-write the opening because when I first started writing this, it was the beginning of summer! See what I mean?) It’s about something I struggle with and I’m always hesitant to write about my struggles here because my goal is to inspire. But I feel like this is an important topic and something that a lot of people deal with, so here it is. I’m going to talk about Fat Girl Mentality. If you’re not sure what Fat Girl Mentality actually is, it’s that constant feeling that people are laughing, pointing, whispering, judging you, and making fun of you all because of your weight and size. It definitely happens when you’re larger, the snide remarks, the stares. That feeling that anyone who looks at you is just judging or even just looking your way because of your size. 

I’m going to be real here, I spent years getting teased and made fun of to my face when I was a child. As I got older, people didn’t say it to my face as much, but I heard things being said when people didn’t know I was there. Let me tell you, things like that tend to scar you for life, especially if you’re like me. I know I’m a sensitive person and things don’t bounce off my shoulders as easily as it does some people, but the teasing still gets me, even as an adult. It doesn’t do miracles for your confidence, I can assure you that. And it sticks with you, it really does. Sometimes I still feel like everyone is looking me, pointing at me, I can even hear the laughter in my head after I leave about the fat girl trying on clothes or shoes and not having any luck. It’s that constant subconscious feeling that you are not worthy and the butt of the joke because of your size. I know I mentioned a few months ago that I desperately need shoes; my old running shoes were a size too big (even with sizing up for running) but they were also over eight years old. You could bend them in half. While looking for new shoes, I must have went to Famous Footwear 10 times, I made a special trip to an outlet mall about 45 minutes away that had 10 or so different shoe stores. Absolutely no luck. I tried men’s shoes, boys shoes, wide width women’s. I have really wide feet, I wear a double wide, and you just can’t easily find double wide running shoes. Shoe shopping is the bane of my existence, I’d rather show for a bathing suit and model it walking through the whole entire mall. Crazy! It was like a reminder of that failure all over again. Who knew that shoe shopping could incite such feelings? It reminded me of shopping for a prom dress or even just a nice outfit for a special occasion and finding nothing that looked right. I imagined the minute I left the store all the sales clerks breathing a sigh of relief that I was gone. It just was such a pain in the butt and I felt so guilty. But all those feelings made me realize that Fat Girl Mentality is totally a real thing. Despite losing over 100lbs, I still feel like the fat girl, the butt of the joke, I see flaws, and while I’ve never been diagnosed, I think I suffer from body dysmorphia. I really don’t know exactly what I look like. I wish I could clone myself or see a girl with the exact same measurements as me, just so I could see what I look like, because I still don’t know what I look like looking in the mirror, or even in pictures. Somedays I think I look great but many other times, I can only point out the negatives and I don’t think I’m seeing myself for who and what I truly am. I still find it hard to believe that’s me in my profile pic on Facebook sometimes!

I’m not exactly sure how I can beat the Fat Girl Mentality I have, and that’s another reason why it is hard for me to write this. I like to have solutions to my problem. I was overweight my whole life (and technically still am considered “overweight” according to BMI charts, which I know are a load of bull in most cases!) and I’ve been at a healthy weight for only a small portion of it, so I know that has something to do with it. The scary thing is that I might not ever be happy with my body. That's what makes all the hard work I've put in the last four years really hard, too; despite it all, I'm still not happy with my body (or certain aspects of my life right now). But with that said, every day I try my best, and I think that is the important thing. I might not ever be completely recovered from this thing called Fat Girl Mentality, but I am recovering. I am trying hard, and that’s all I can do. 

Here’s a shoutout to all those people who are working on loving their body, because it’s that crap is hard, and I commend you!

Friday, July 8, 2016

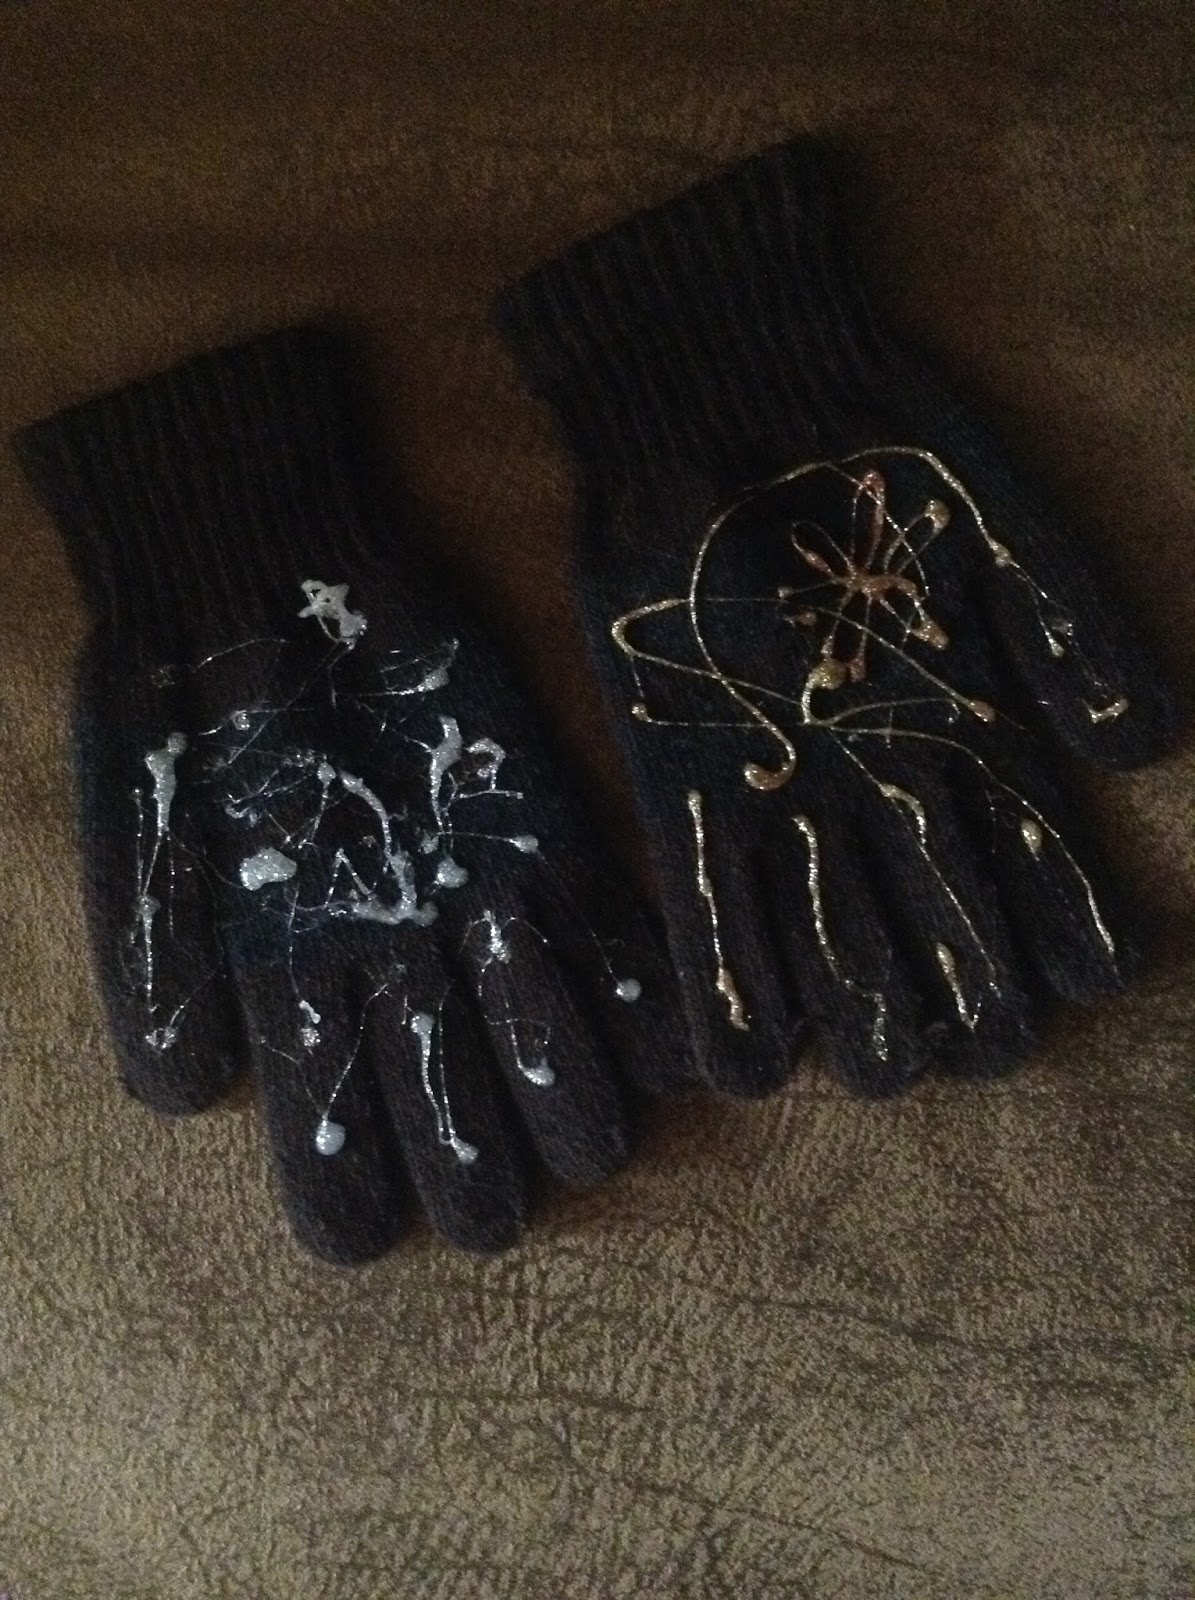
DIY non-flip gloves and headbands

Have you ever gone to the store to buy some non-slip yoga gloves or a non-slip headband and been blown away by the price?! Who would have thought that such a little extra detail such as non-slip would make things so expensive! Especially when you consider how long these last, which is not long in my experience. Once the grip starts to wear off, they’re just like wearing a pair of regular gloves. Non-Slip yoga gloves are one of my must haves for workouts because they my hands from slipping while doing pushups, in plank or downward dog, or just giving me some extra security while using dumb bells. And having the non-slip headbands help keep those straggly hairs out of the way and make things less annoying. Who wants to pay a pretty penny for such things when you can basically make the same thing for a fraction of the cost? So, get out your hot glue guns because yep, that’s what we’re using. Hot glue. 

;) Really simple! Just get a cheap pair of gloves, some glue sticks and a hot glue gun. I got my gloves from the dollar store. I've had the glue gun for years and years but you can pick them and the glue sticks up at about anywhere. I used sparkly glitter glue sticks because everything is better with sparkles and glitter and I got them at Walmart. You can cut the tips of the gloves or you can just let them go. I’ve personally not cut the fingers off of my gloves, but the yoga gloves I did buy were fingerless. It's up to you and what you like. If you do cut off the fingertips of your gloves, they might unravel. You can try to make a special design with your hot glue, or you can be like me and give it a good effort but still just squirt glue out in random places! Either one works at the grip. The glue might not last forever, but that's been my experience with yoga gloves also, and this is way cheaper (and works just as well). And the cool thing is that you can add more when you need to.


This is how I made the headbands, too! Hot glue. I just got some cheap headbands from Walmart. Mine are about an inch wide and I wish I had gotten a little wider but I wasn't thinking. I don't think it really matters, I just personally like them a little wider. I got a pack of six for under $3, and tried to decorate the headbands by writing words or drawing little designs. Some came out better than others!

You can decorate the underside and keep the outside that shows plain or you can go the extra mile and decorate it all! One thing that might help here is to put your headbands on a piece of cardboard or something so they’re stretched a bit, but it’s not necessary if you don’t have cardboard. I just noticed that when I went to stretch these on my head that it was hard to stretch because of the hot glue. But they stayed on my head find and didn't slip any more (or less!) than what I've bought in the store. Since making them myself was way cheaper than going to the store and buying them and they work just as well, it's a win! A wallet win, and a win for me. :D.

There ya go! DIY Non-Slip gloves and headbands. This would work on socks also to make some non-slip socks. Isn’t it crazy how something so simple seems to be super expensive in the store!

So what do you guys think about something like this? I love, love, love DIY and crafting and when I can tie it in with fitness, it’s just extra great. Got any ideas you want to see? 


Wednesday, May 18, 2016

Cauliflower pizza bite recipe!

Hey guys! I tried a new recipe tonight and I loved it. It usually takes me a few days to get all my thoughts down and make a blog post (and I’ve actually got another one started!), but these were so good that I just couldn’t wait to share the recipe! It’s meant to be like a pizza muffin but made with cauliflower! And they were super yummy! Here is a printer friendly version!!


You’ll need something to grate your cauliflower with. I used a cheese grater but next time I do this, I’m going to use my ninja chopper so it goes faster. You need four cups of grated cauliflower, three eggs, some seasonings like Italian seasoning, onion salt, and then filling of your choice. I used cheese and black olives. You can add a wide variety of things to these. Just because they're pizza inspired doesn't mean that they have to include pizza toppings! We were thinking of all the fun things we could add in here!


Add three eggs into your grated cauliflower, a tablespoon of Italian seasoning, a teaspoon of onion salt (don’t add in a tablespoon of this salt like we did! Whoops!), a teaspoon of garlic powder, and then your fillings of choice. I used about a third of a cup of cheese and then chopped up some black olives since they’re a favorite pizza topping of mine. You bake them for 30 or so minutes at 400 degrees. When they’re finished, try not to enjoy them too much. ;) But if you do, it's okay! These are super healthy and guilt free!


They were super delicious. After mixing all the ingredients together, I wasn’t quite sure they would come out right but once I pulled them out of the oven, I knew I had done it right! I saw this recipe on our local radio station’s FB page and I’ve been wanting to try them ever since. Since tonight was the Survivor finale, I thought it would be a great opportunity to make these awesome snacks! I think I need a drool face emote! 

Have you made something like this? 

Saturday, April 30, 2016

Jillian Michaels Killer Abs - Level 2 Review

Hey guys! I finally decided to give Level 2 of Killer Abs a try. I've done it a couple of times and I think I've got a good idea of how I like it now! If you saw my Level 1 review, you’ll know that I love, love, love it! It was so hard to move to Level 2 simply because I loved and still love the first level so much! So how does Level 2 add up?

Natalie and Nicola are back for Level 2, and the DVD starts quickly with a quick warmup that includes windmill skater, jumping man, halo squats, skipping in place, and snap kicks. After the warmup, you move to the first circuit. The first circuit has you on the floor in a wide pushup, and then into extended plank. I can’t decide if I love or hate extended plank. Next is something I think I do hate, which is chest press, fly, and headbanger in hollow man. The reason why I hate these is because it’s almost a little too much, and I don’t want to downgrade my weights and make it too easy with fives, but using eights, I have to modify and keep my legs down, which is a kick to the ol’ ego. Next you’re doing around the world hip heist, doing doing them in a circle. These always take me a few to get to them. I don’t think I’ve actually done them right once since starting the DVD. Finally it’s sumo boat. I get my eight pound weight and I just feel all excited because I know a year ago I would NOT have been able to do this. Rinse and repeat for the other side. 

On to circuit two, which is my favorite! You start out doing diagonal touch town, which is where you stand in a surfer position and twist, and then extend your weight and leg. Kind of reminds me of a dance move! Then you do alternating side lunges with a back fly. Cardio is standing mountain climber with shoulder presses, and then a good morning press. And then next is a lunge chop which makes me feel like a lumberjack. Repeat on the opposite side. I have no idea why this one is my favorite other than maybe there is some cardio? I LOVE CARDIO. 

Then that damn circuit 3. I think I tend to hate circuit 3 in every Jillian DVD. I know Killer Body core level 3 at one point made me want to cry. Maybe it’s just core workouts?! Anyway, you’re doing another pushup variation where you pushup and go into table or something. I actually just do pushups here because I’m the kind of person that needs to watch the DVD first to make sure I have the moves down. I did that with this one too but I forget what the move looks like. So rather than watching the moves instead of actually doing them to make sure I have it right, I just do pushups and will continue just doing pushups here until I remember that I need to fast forward and watch that part again to see what to do. Then she has you do bicycle crunches in boat which I can totally do now! Woo! I could not do these a couple months ago! After that you do superman rolls into pike, which is a favorite of mine. Next you do a chaturanga pushup with a knee twist, and I tend to modify these because I have never been able to manage chaturanga pushups well. Next is side plank angels, which I also modify. I can’t figure out if I hate this circuit because I have to modify and that is a hit to the ol’ ego again or if its just because these are my least favorite moves. Once you do those, repeat not he other side. Try not to die! Maybe that’s why she ends the circuit with side plank angels?! Haha. 

Circuit four is a little bit better. You’re up doing side to side hops, which I really like. Then you do sit up, stand up which I love to hate. These are in several other Jillian DVD’s and in some of them I do and in others I don’t. Because I can see myself breaking an ankle or flying forward after standing, I usually modify these somehow. In this one, I reverse crunch, and then so a sit up. Next is reverse plank, driving your knee up. After that, you’re doing three point burps. And then you’re not he floor doing scissor abs. Repeat and then you’re done! After a quick cool down, you’re done! REJOICE!

All right, so while I like Level 2, it is not my favorite. I've talked about level 1 enough for everyone to get that it's my favorite ab workout so far! Level 2 just feels more like an ab workout. And of course, that’s what it is, but I abhor ab workouts. I think some of my dislike for level 2 is that I need to modify a lot of it. It’s a bit hard for me to follow, and that’s probably why I don’t like it as much as I do level 1. But in all, I do feel like it’s a good workout! I alternate this one and Level 1 a lot. I felt like I had to move from level 1 because it was just getting way too easy. 


So there it is, level 2! Have you tried it? What do you think? If you're interested in buying, you can check out the DVD on Amazon buy clicking here! 

Sunday, April 10, 2016

Springing along!

Is anyone else just ready for Spring? I know I am. I’m tired of these 1-2 days of warm weather only to have it rain and get cold. Phew. I’m ready to get outside and take the dog on some nice walks and really test out my Fitbit someplace besides the treadmill and in my bedroom doing Jillian DVD’s. It’s not that I’m necessarily getting bored with my workouts, but I just am itching for a change somewhere and I think the weather changing would be a great start. 

Nothing has really changed too much lately. Right now my workouts are an hour of treadmill or a run everyday where I average 4.3-4.5 miles. I don’t try to necessarily “kill” it, but I just try to keep a decent pace and get a good amount of cardio in. I still love cardio more than anything else, and I think it’s because I can do my own thing. I can listen to my own music, I can just have a good time. I can run, I can dance, I can listen to cheesy 80s music, Disney, or DDR music. With that said, strength training has changed my body in awesome ways, so I’ve been keeping up with Jillian. As I mentioned in previous entries, I’ve been doing Killer Body - Upper body workout and Killer Abs Level 1 (still not gotten to moving up to Level 2, but I want to. Level 1 is starting to get easy but I love it so, so much!) but just a couple weeks ago I added in Killer Buns and Thighs and I’ve been doing Level 1 of that also. I don’t have a set schedule of what workout where, but I alternate a shower one night and a bubble bath the next and on nights where I shower, I’m more pressed on time, so I tend to do Killer Abs OR Killer Body Upper because they’re shorter. Despite Jillian going on and on about Killer Buns and Thighs being under 30 minutes, she doesn’t know how to count, and that one is 40 minutes from warm up to cool down. Those extra 10 minutes are needed on nights where I shower, wash my hair, and so on. I try to do each workout twice a week. Still struggling with days off, but I’ve been trying to take off one day a month running and Jillian, hmm. I’m iffy with her. Honestly, I really am starting to dislike Jillian workouts and am DESPERATELY looking for a strength training program that is LIKE Jillian’s; same length, same style, but just different. Maybe I need to switch and look into a new Jillian DVD but I think it’s just that I want to branch out to more trainers. But because I am beginning to see Jillian as a chore, it makes me more nervous to take the days off. I’ve slipped off the strength training bandwagon before, and I definitely don’t want that to happen again with Spring and Summer weather coming up! Plus, my ten year high school reunion (really!? 10 years ALREADY?!) is coming up and who doesn’t want to look their best for that?!

Other than that, not much going on. I’ve been dealing with some back pain and I think it’s because I desperately need new shoes. I have really weird feet; they’re extremely wide and pretty small too. They just do not make shoes that are small enough (left foot is a 6, right foot is a 7) and WIDE enough. I mean, they make one or the other, but not both! Not that I can find in my price range at least! I’ve been to so many shoe stores to the point where I feel like the salesclerks picture me in their nightmares. I've bought 3-4 pair of shoes, but none of them work out and I have to return them. I wore one pair of shoes for almost five months thinking, “Okay, gonna break them in any day now!” when I finally realized, okay, after five months constant pain, these shoes are NOT going to work for me. Right now the Nike Air Pegasus’s I’m running in are over 8 years old, and they are literally holding together by threads. They just have no support anymore, and my ankles, legs, and lower back are now really starting to protest these shoes. (Which is why I alternate between baths and showers now; the baths help my legs and back ease enough to where I can sleep. That bath bomb recipe I posted earlier has been a godsend!) I am the only woman I know that would go bathing suit shopping and model for all the strangers in the mall rather than shoe shop. Shoe shopping brings up a whole new wave of feelings, which I hope to touch base on shortly. Ever heard of Fat-Girl Mentality? Oh man, do I have it bad. 

So now that we’re in April, how has your 2016 been going so far? My goal for the year was to have 1000 active miles. I’m already 386 miles into my 1000 goal for the year! Pretty proud of myself! That’s a rough estimate as I always run just over four miles a day, but I also count it as four, regardless if I go just a little over. The treadmill says I run 4.3 miles and Fitbit says 4.6 miles while on the treadmill, so not sure which one is right so I just say four and make it easy! I’m trying to think of new goals to set to try and keep myself on the upside. This has been a rough year so far. My dad’s side of the family has suffered two very sad losses and that’s been hard. It is a reminder that time on earth is limited and a beautiful gift. I’m trying to stress less and enjoy life more, and I’m trying to be as healthy as possible. To be honest, I’m not 100% sure I’m happy and healthy mentally right now, but I will touch base on that soon with a new blog hopefully very soon! 


Think some duct tape will help my shoes?! ;) Phew. Aren't they a mess?!


Happy April!

Saturday, March 12, 2016

Jillian Michaels Killer Abs - Level 1 Review.

I’ve found it. I have found it!! A core or ab workout that I do not hate. Run off and buy a lottery ticket because you might just get lucky. It’s rare that I find an ab or core workout that I like. It’s Killer Abs and it’s by Jillian Michaels. I’ve done the first level quite a few times and here is my review!

Like all Jillian DVD’s, she has two girls demonstrating the moves, one doing the advanced and another doing the modified version. In this DVD, she has Natalie and Nicola. I’m a big Natalie fan but I also like Nicola, too! I’ve learned if that the background girls are likable and fun, they make the DVD’s more fun (like Golden and Mimi in Killer Body Upper and Lower) and that is definitely the case with Killer Abs. The DVD starts off with a quick warm up of marching in place, mummy walk, alternating knee twist, and then what Jillian calls a plunge. You get in plank and you bring one foot up outside your hand and back, the other foot up and back, and then four mountain climbers. After that you’re ready to move!

Circuit one has you doing inchworm. You walk out into plank, walk your legs up, and then step or jump back and then walk your hands back up, and then stand. Next you get into a sumo squat and do an oblique crunch, touching the floor. Then crescent crunches, where you are in crescent pose and crunch forward, as if bringing your nose to your knee. You can hold on to a weight, which I hold on to an eight pound dumbbell with this one. Last move before you get your heart rate up with high knees and repeat on the opposite side is roller boat. I love roller boat for one reason: this move tells me how far I’ve come! I used to hate anything in boat pose because it was so hard. I can do it now! :D Is that a non scale victory?! 

In circuit two, you get into a static lunge with your arms out parallel to the floor, and you twist your torso to the side. Then she has you get your heart rate up with doing this little jig she calls River Dance (I live on a little river town on the banks of the Ohio River and I am always so amused by the term River Dance!) where you basically are kicking your feet out and lifting your legs up a bit. It kind of reminds me of high knees but not quite. Then she has you get into down dog and bring your knee in. I think this is a move that also is in Ripped In 30 but I can’t remember. It seemed awful familiar! Next is triangle, which I’m super familiar with now because it’s been in a ton of Jillian DVD’s. After that, get ready to get your heart rate up with jump rope drills. Four high knees, four kicking your legs out straight, keep doing that for about 30 seconds. You get to do it all over again on the opposite side. Have fun! 

All right, now it’s time to get on the mat! The next two circuits take place on the mat entirely. Circuit three you get on the floor and you do a leg raise, a star crunch, and then a reverse crunch all as one move. Then you to plank jack moguls, which I love only because I used to hate plank moves but now I can do them! Flip over onto your back and you’re circling your legs with tornadoes. Next you get into bear crawl and crawl up for steps and then rotate and crab walk back four steps. Remember when I used to hate bear walk? Last is on your back again, your torso at a 45 degree angle, and you’re twisting your torso. I held on to the eight pound dumbbell again. 

Circuit four you get on your elbows in an ab hold on your elbows, and twist your knee in and then out and then back to repeat on the other leg. By now, you’re really feeling it in your abs. Then she has you go into dancing crab, which I love to hate. By now my abs are usually screaming and crying. She gives you a tiny break with uneven table, but then she gets you back by doing this elbow planking pike move that is pure evil. She says you need a slippery surface. I use furniture sliders, and from an elbow plank, you pike up. This is 100% abs and phew, it's tough. Next is a move that Jillian calls the Carolina after her yoga teacher, where you have both legs up in the air, you stay in a static crunch, and then bring one leg up and down. Rinse, repeat, and hallelujah because it is time to cool down. The cool down seems awful quick, but I’m not complaining because usually by now I’m just done! Phew. 

I really, really, REALLY like this workout! It’s tough enough for me that I feel challenged, but fun enough that I like it more than anything else right now! I’ve been alternating between Killer Body upper and then Killer Abs Level 1 (do want to do level 2. I have watched and it looks like it’ll be awesome! Just need a bit more space, and once the weather heats up, I’ll be able to go back to the living room to work out and not freeze!) and so far I like it. I do miss working out my legs and I’m trying to decide if I want to do Killer Buns and Thighs or Killer Body Lower OR look into someone new. As much as I like doing Jillian workouts, I like broadening my horizons! Anyone have a suggestion?! 

What I love most about Killer Abs is that it has some moves that I have’t done in a while and it reminds me of where I was a year ago, some of these moves I suffered though, not even kidding! And now I can do them! I don’t always see changes in my body but to know that the moves I hated and struggled through I can now do is an amazing feeling. There were a lot of epiphanies with this DVD!


So there it is, Killer Abs level 1! I like it a lot! :D Interested in buying a copy for yourself? Check out the DVD on Amazon!

Friday, February 26, 2016

Treating myself with bath bombs!!

Hey guys! How has your February been now that the month is almost over? I definitely cannot complain about mine! February is a pretty cool month for me regardless because I happen to be born in February! Any February 9th babies out there?! Special shoutout to you! Even bigger shoutout to the ones born in 1988 - I was born at 2:29PM - am I older?! :D 

I’m pretty sure mentioned before that I have some issues taking rest days. This is because I’m so afraid of falling off the bandwagon and because of the guilt that I experience on days off or on days where I might indulge a little more than usual. Since I know that’s not healthy at all, I’ve been coming up with ways to treat myself! This month I’ve been making sure to stop telling myself no so much, and I’ve also been giving myself LOTS of love by means of bubble baths!! I love love love bubble baths. Growing up, my parents only had a shower stall in the bathroom that we had access too (we rented the second floor with the beautiful claw toed tub out until I was in 8th grade) so my bubble baths were limited to Grandma Doris’s house and a large storage container that I used as a tub until I got too big for it and old enough to just take showers anyway. Maybe that’s why I prefer bubble baths now as an adult? While a bubble bath is nice in general, I like to go the extra mile! So I’ve been trying my hand at making bath bombs! I’ve finally found a recipe that works pretty for me and I’m so excited to share!

Bath Bomb Recipe!


The ingredients you will need are baking soda, cornstarch, epsom salts, citric acid, oil, essential or fragrance oil, soap or food coloring, a teeny bit of water, and a mold. I used a medium size Easter egg. You can usually find the citric acid in the canning section of the supermarket. It was a bit difficult for me to find, but I found mine right away at Meijer! I got scented oil for soap and soap coloring at my local craft store but food coloring would be all right, and on the last couple I made, I’ve been out of scented oil for soap, and I’ve used lavender scented baby oil. 


Dry ingredients list
1/2 baking soda
1/4 cornstarch
1/4 citric acid
1/4 epsom salt

First you take your dry ingredients. You need 1/2 cup of baking soda, and then 1/4 cup of cornstarch, epsom salts, and citric acid. I use a whisk to mix them together and make sure all my dry ingredients are thoroughly mixed. 


Second you mix together your wet ingredients, and this is where things get a bit tricky depending on your location, you level of humidity, and so on. Here’s what worked best for me. Take 3 teaspoons of oil first. I used castor oil but any oil would be all right. Olive oil, coconut oil, baby oil, you get the idea. The first recipe I found on Youtube called for a tablespoon of essential or scented oil. My first two batches of bath bombs, I followed it to a T. It works all right, but the scent was VERY strong. That’s okay, but I also had problems with the wet ingredients reacting with the dry ingredients when I mixed them and expanding a little bit and taking a long time to dry. Because of this, I added in one to two teaspoons of scented oil to my castor oil. Next I added several drops of my soap (or food) coloring. I added quite a but because I like the color to be fairly dark and vibrant. I don’t have an exact teaspoon amount, but I put anywhere from 20-30 drops in. I mix my wet ingredients and then SLOWLY mix it to my dry ingredients. I’ve actually learned that the wet oils don’t exactly start the fizzing in the dry ingredients, but I still use my whisk and mix the wet and the dry ingredients very, very quickly to try and avoid any reaction.


Once it’s all mixed up, you will have a consistency of slightly wet sand. You can press it together in your hand but for me, the bath bomb still crumbles when you try and it in your mold (I used a plastic easter egg) or at least it does for me. In this second youtube video I found, these girls added in the wet oil ingredients and the dry ingredients and then added the water last. This has worked great for me! I use 1-2 tablespoons of water and either mix it in VERY slowly, whisking as I mix in the water to avoid reaction, or I use a spray bottle, still whisking quickly as I mix the water. Once finished, this gives me the same consistency of wet sand, but instead of slightly wet, it’s slightly wetter if that makes sense. I took this video to give you an idea of what the consistency looks like for me!
A video posted by Julie (@z0mgaah) on


You can stop here and bottle up the mixture as a fizzy bath salt, or you can continue making bombs. Pack the mixture into both sides the mold tightly to where it is overflowing and them press together. Carefully take off one side of your egg/mold and then the other. If your bomb crumbles, you might need more water. One thing I’ve been doing is that after taking out my bomb out of my egg, I will press it between my hands to make sure it really is packed in. As you can see in my images, the bombs look slightly lumpy and more round than an oblong egg shape, but I just like making sure they’re completely packed together. This recipe makes two to two and a half medium sized bath bombs. After packing them together, I set them on a paper cupcake holder to dry out at least overnight, sometimes up to 48 hours. Then I drop them in the bath tub and thoroughly enjoy the fizzy goodness! The epsom salt helps my sore and achy muscles, the fragrance makes the whole bathroom smell amazing, and the oil helps my dry skin.


It’s an awesome way to treat yourself after a long week of hardcore workouts! I love soaking in the tub and using these along with my favorite bubble bath! What a way to relax… dim the lights, play some music, and just relax. Ahhhh!

Interested to see how they work? Here is one I used the other night. Same recipe I shared, just used a different soap coloring!
A video posted by Julie (@z0mgaah) on


I like to think of working out as a way to better myself and in the long run, I hope it’ll be a great treat, but it’s obviously not like a bubble bath! What’s you favorite way to treat yourself?